

In transportation modeling and traffic simulation, managing corridor alternatives with copy‑and‑paste networks quickly spirals: folders multiply, names drift, and “final” never is. On a corridor in Dane County, Wisconsin – where mobility outcomes and comparability mattered – we chose a different path. We used the PTV Vissim Scenario Manager to anchor every alternative to one calibrated base and organized all changes into three buckets: geometry, signal control, and demand. We also built a demand pipeline that kept routing coherent across scenarios and made OD variants easy to swap.
In this article, we show how we set up Scenario Manager, the three‑bucket method, the workflow we use to swap OD variants in seconds, and the pitfalls to avoid (precedence, seams, and controllers) – so you can test more corridor options, cut rework, and keep reviews auditable.
Project scope & aims
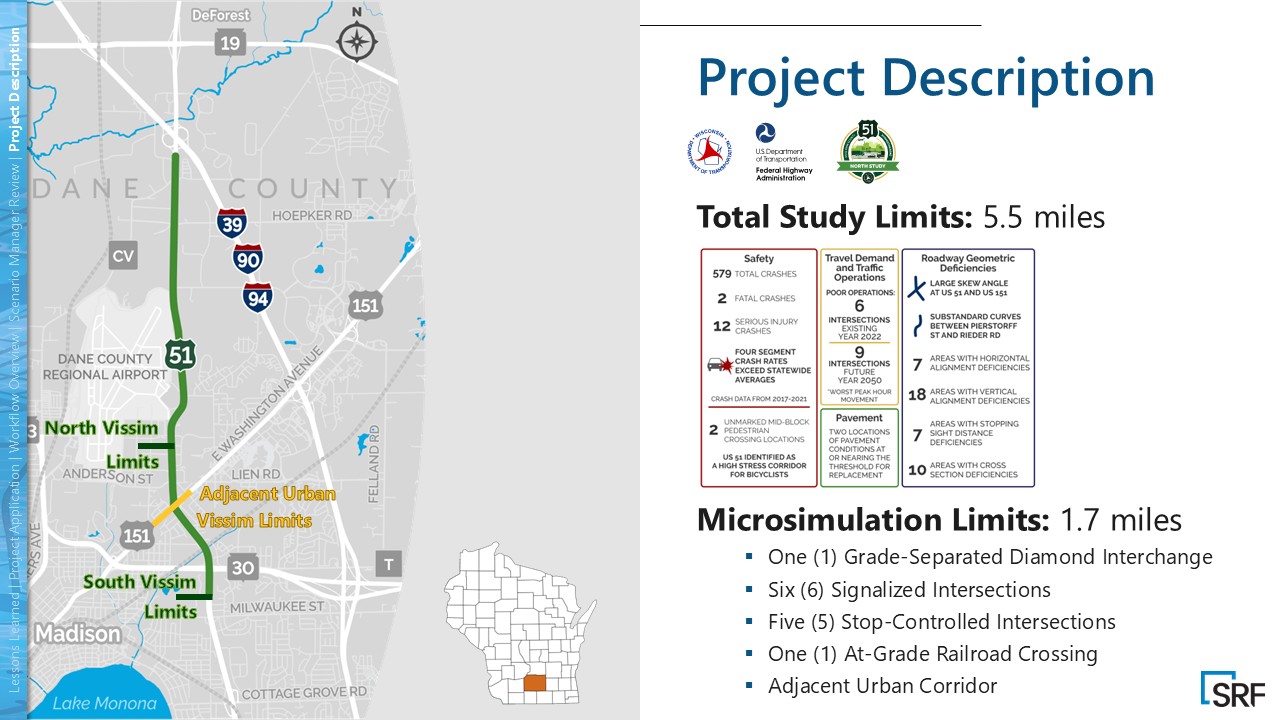
We modeled ~1.7 miles of the US‑51 highway in Dane County, south‑central Wisconsin. The study area includes a diamond interchange, six signals, five stop‑controlled intersections, a railroad crossing, and the US‑151 junction – the primary approach to downtown Madison.
This work was part of a NEPA corridor study – the federal environmental review process for transportation projects – focused on mobility and bicycle/pedestrian safety.
Our aim was to evaluate multiple geometry and signal alternatives around the US‑151 junction while maintaining apples‑to‑apples comparability between no‑build and build scenarios, and to capture upstream and downstream effects for the Wisconsin Department of Transportation (WisDOT).
What is PTV Vissim Scenario Manager?
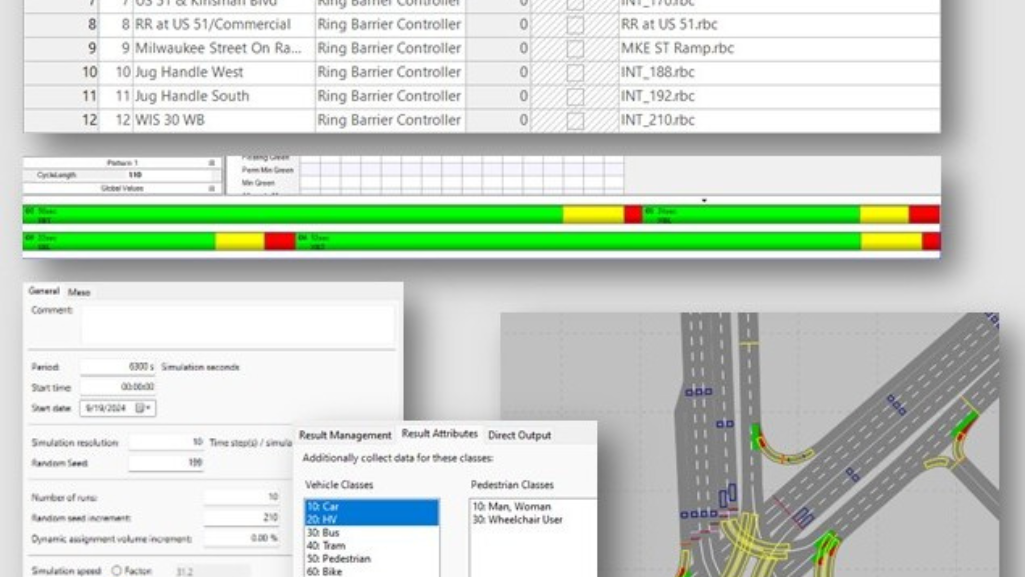
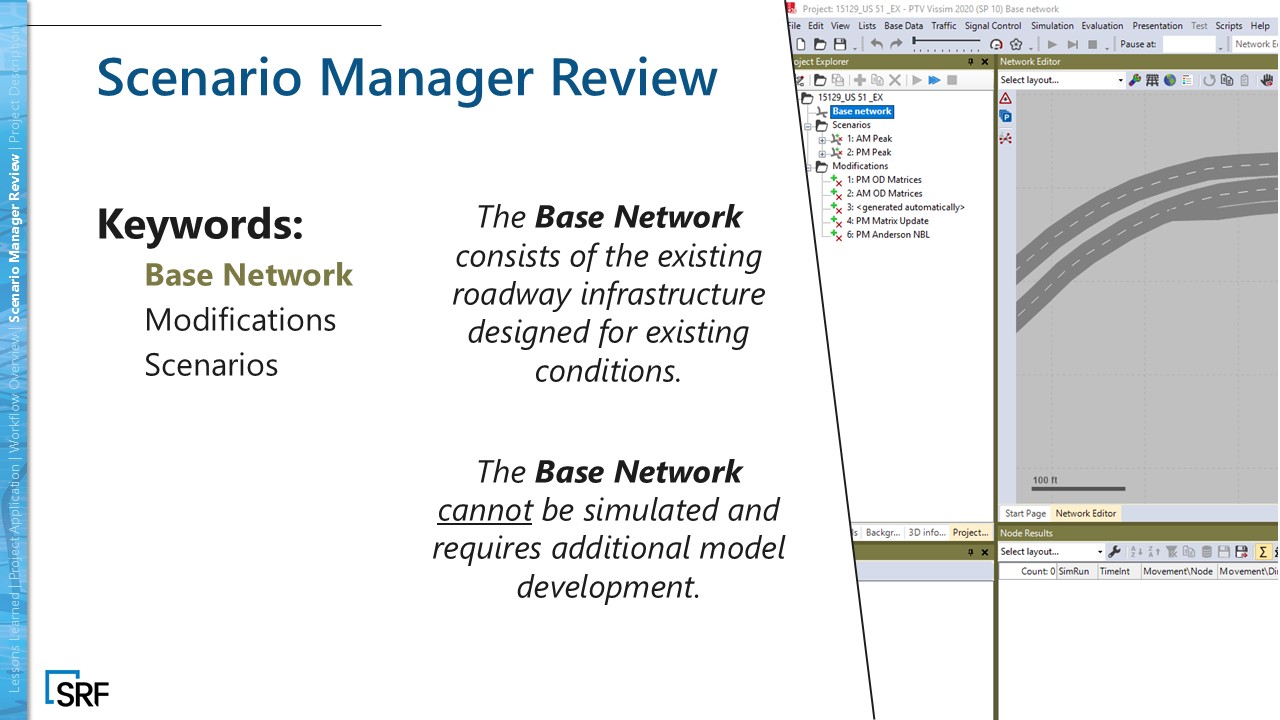
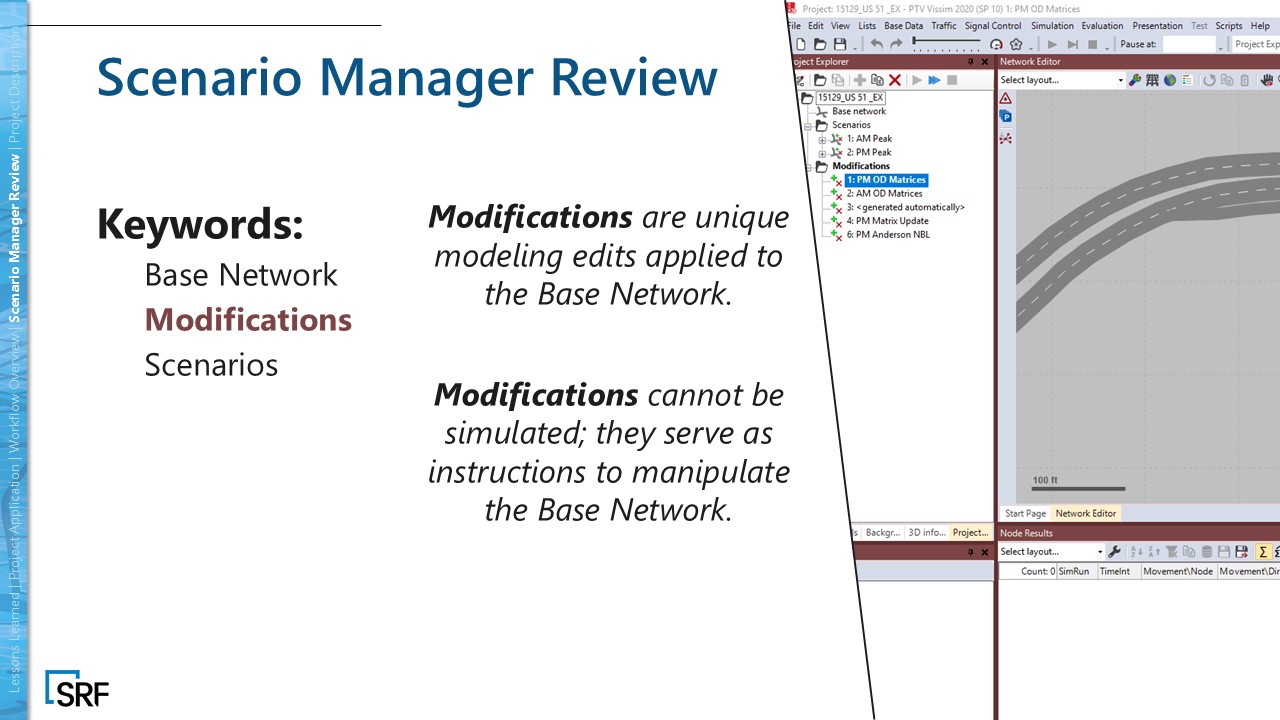
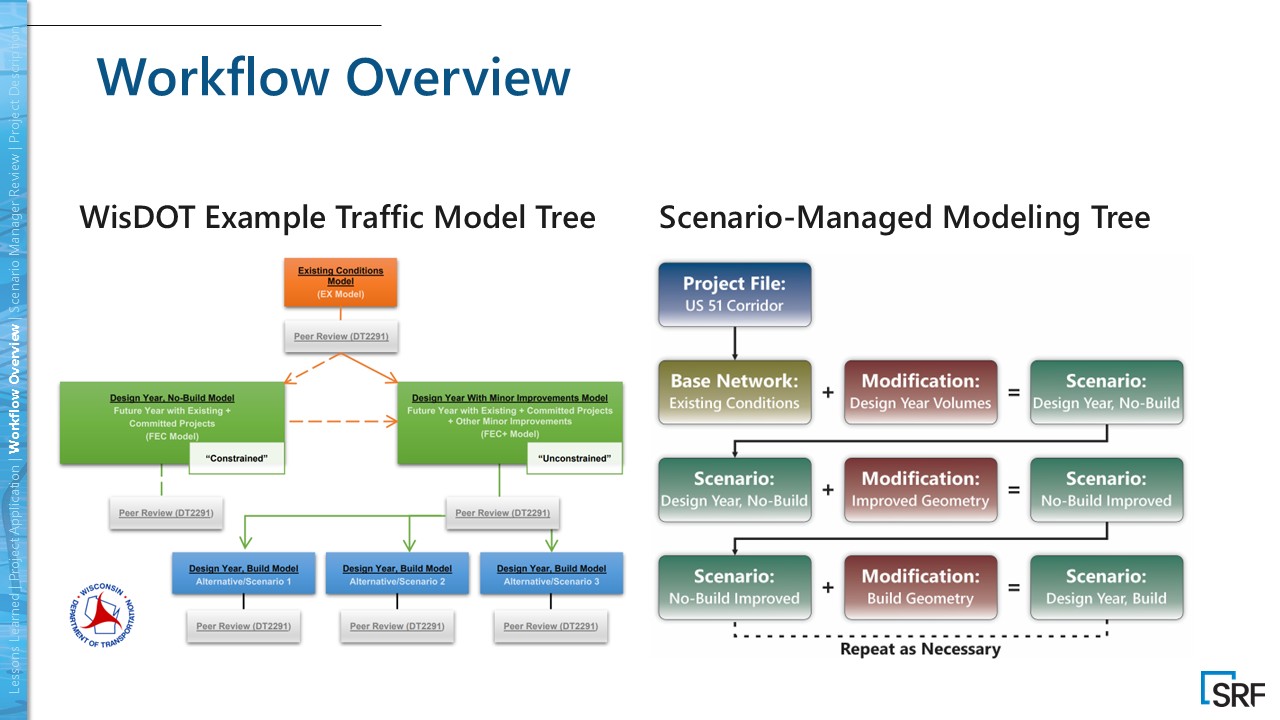
In PTV Vissim, Scenario Manager keeps related networks in a single project so you can compare like‑for‑like cases without duplicating files. A scenario = base network + an ordered list of modifications applied consecutively; there’s no separate network file unless you export. Because modifications store the resulting state (not the click‑by‑click history), it pays to plan which objects each modification owns – and avoid editing the base once you start stacking.
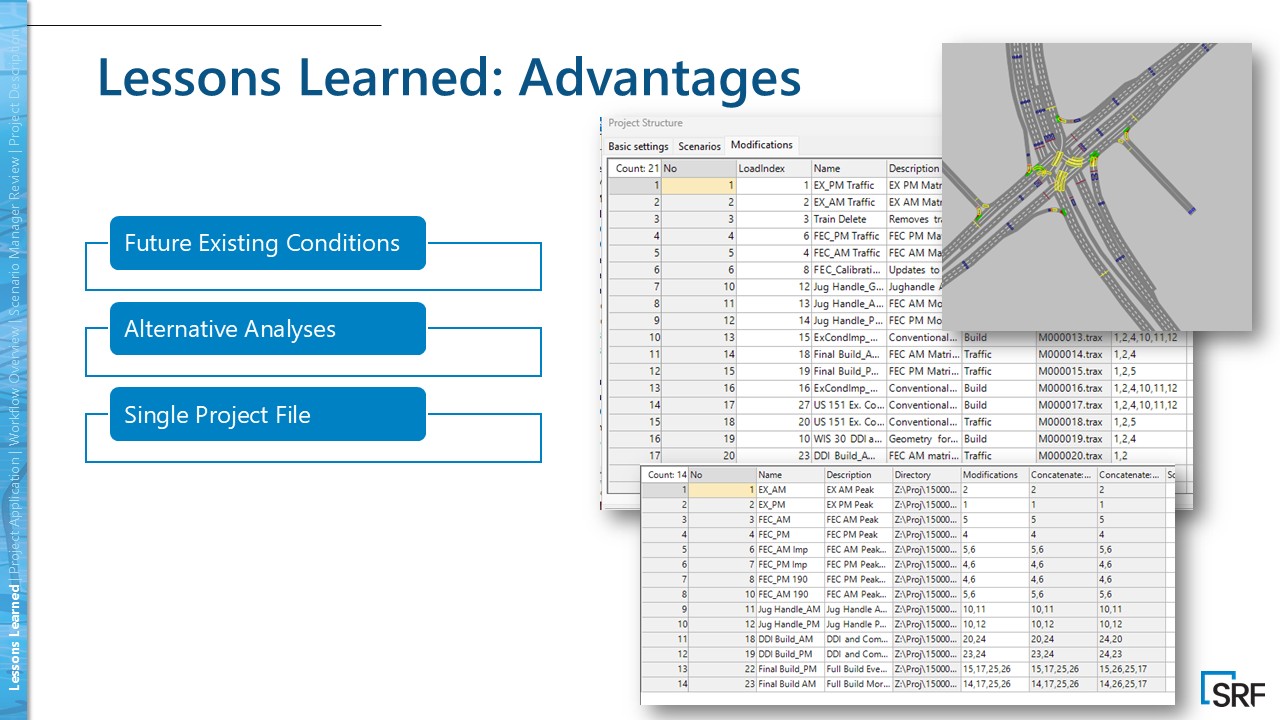
Our 3‑bucket method
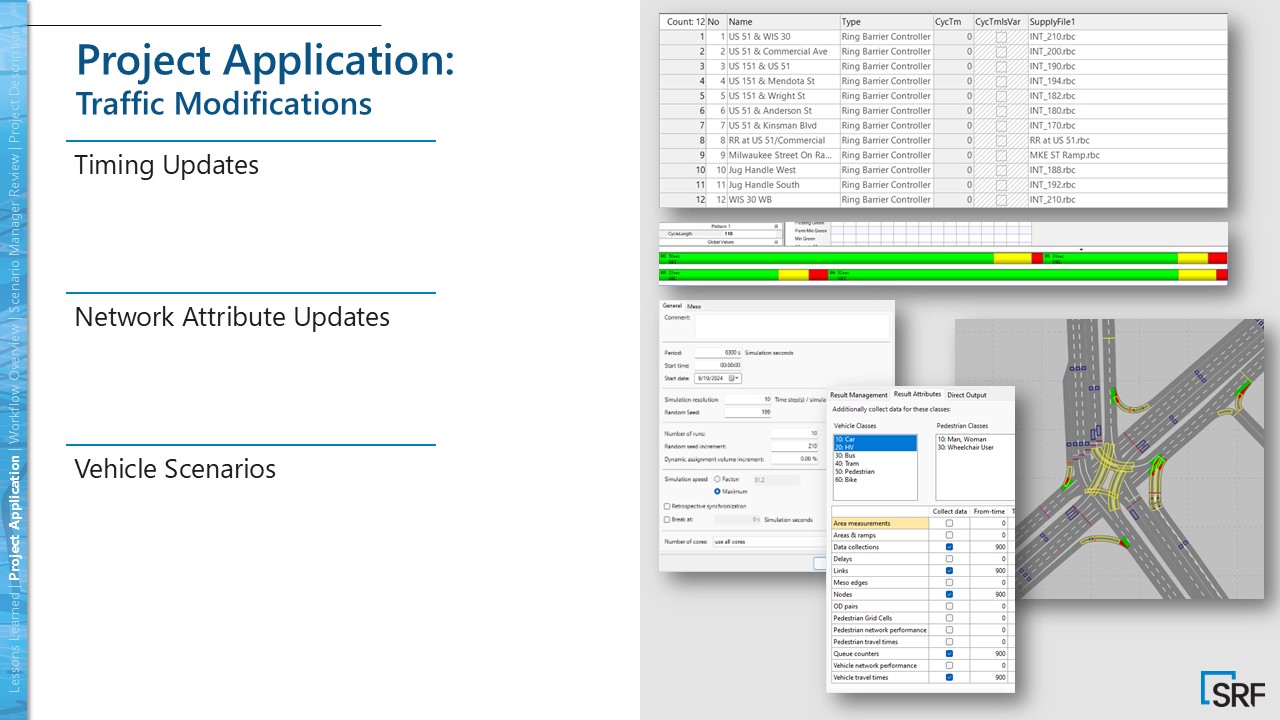
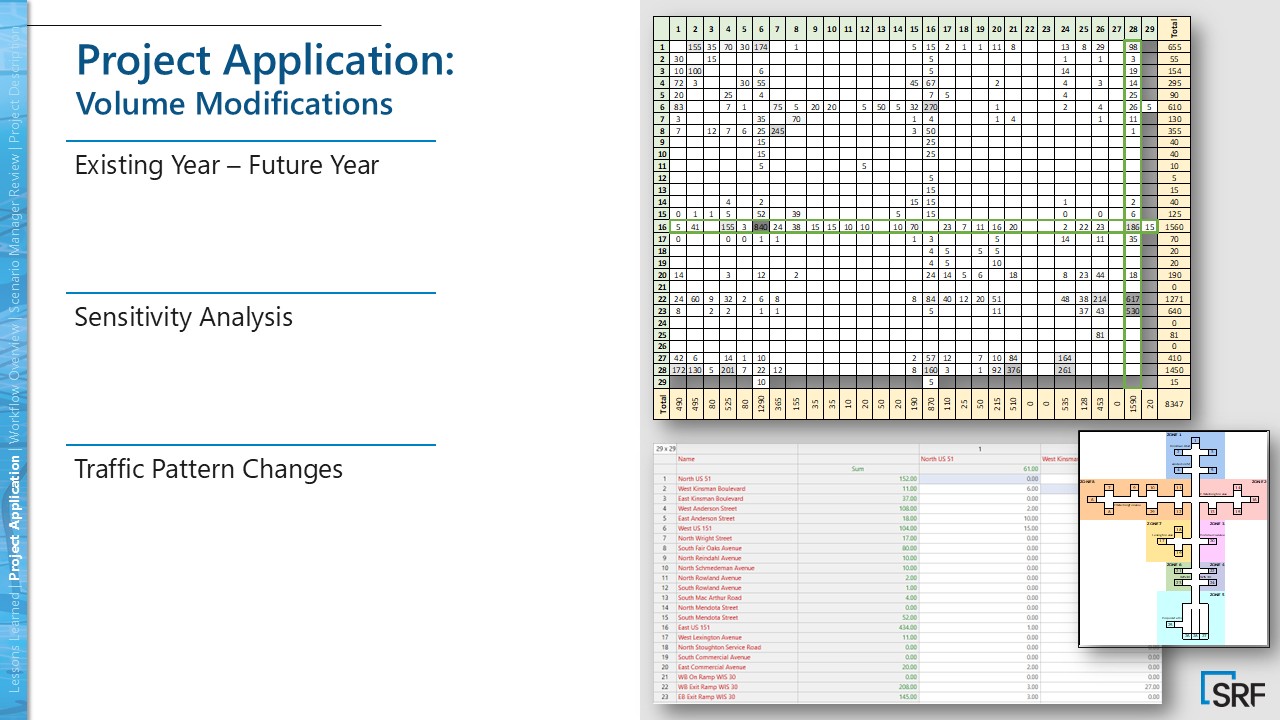
We treat the base as sacred; modifications are change‑sets; scenarios are stacks. Our three buckets: Geometry (links, lanes, connectors by intersection); Signals (timings, offsets, coordination, rail preemption); Demand (OD matrices – existing, design‑year, sensitivities).
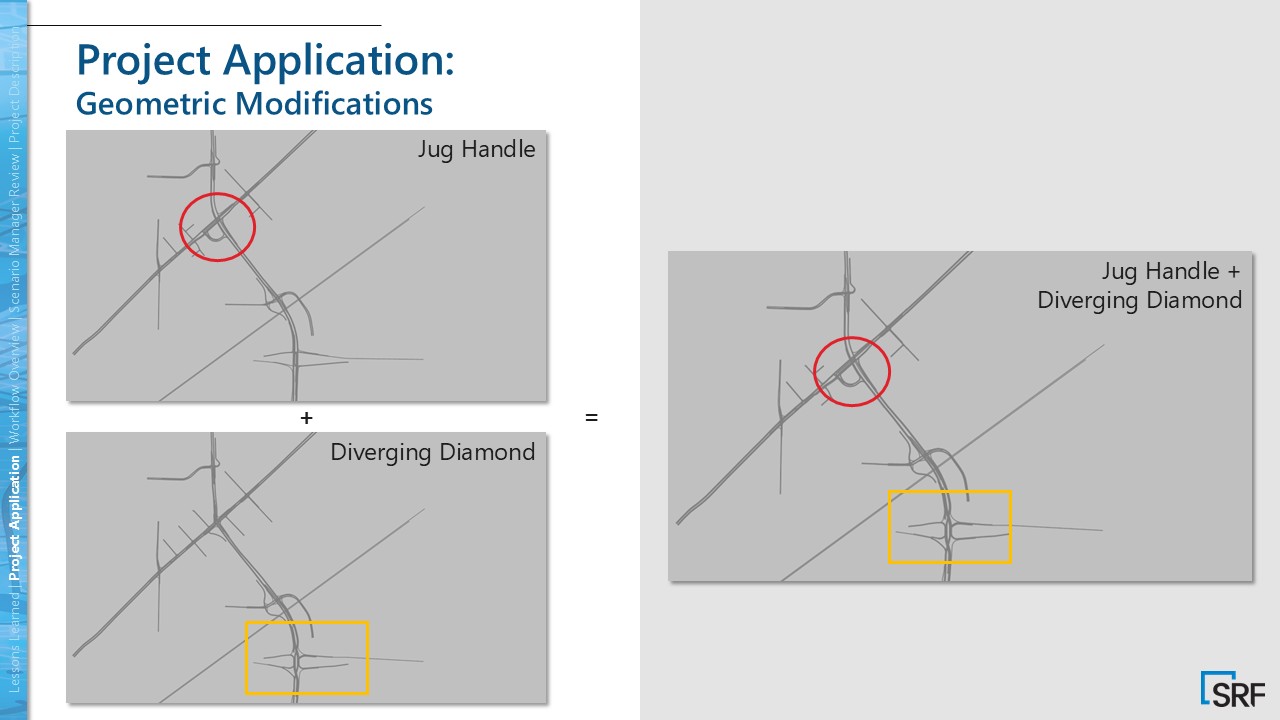
This modularity let us mix a jughandle at the urban node with a DDI to the south, then pair either with distinct signal plans and OD sets – no cloned networks, no drift.

Workflow
We calibrated existing conditions once and reused that base for everything else; reviewers saw exactly which modifications were active in each run – an auditable stack rather than a new folder.
We created OD with PTV Visum ODME and kept each volume set as its own demand modification, so swapping demand across geometry or signal plans took seconds.
Finally, we assigned ownership: geometry lives in geometry mods, signal logic in signal mods, and nothing crosses buckets – preventing precedence conflicts when stacking.
Note: On this project, we intentionally used an older Vissim version for consistency with surrounding WisDOT work, ensuring comparability across efforts.
Day‑to‑day: permutations as a checkbox exercise
A typical review request sounded like: “Keep the jughandle but try the other signal plan with existing volumes.” We didn’t rebuild anything; we restacked – selecting the geometry, signals, and demand modifications that fit the question, all backed by the same calibrated base. The modification list became living documentation of what changed and why.
Challenges & lessons learned
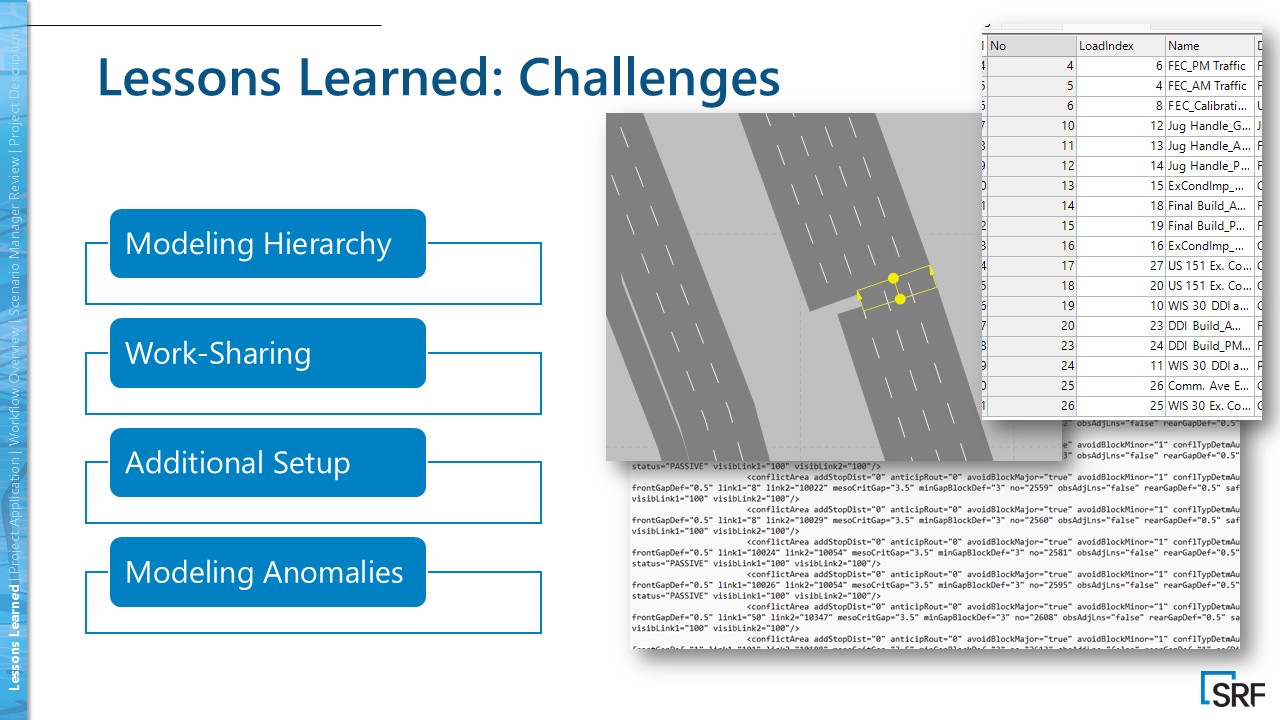
Precedence matters. If two modifications touch the same object, the last one wins – hence strict bucket ownership.
Work‑sharing is mostly serialized: one active editor per managed project; you can export scenarios to run in parallel, but you trade away some traceability, so plan compute and QA accordingly.
Geometry seams at intersection cuts require careful boundaries; and controller seeding helps (add “dummy” signals to the base so build‑only controllers don’t invalidate downstream modifications).
How to set up Scenario Manager fast
- Create a managed project and set your calibrated base. Treat it as read‑only after sign‑off.
- Add modifications by bucket: geometry (per intersection), signals (timing/coordination/preemption), demand (OD variants).
- Assign object ownership so each object is edited in exactly one bucket; avoid cross‑contamination to prevent precedence clashes.
- Build scenarios by stacking the needed modifications in order. Export for parallel runs only when necessary, and document QA notes per scenario.
Checklist to avoid cloned networks and drift
- Lock the base. Calibrate existing conditions until you trust them for every scenario.
- Partition by concern. Keep geometry, signals, and demand in separate modifications; never cross‑contaminate.
- Scope your cuts. Give geometry mods clear geographic boundaries (we went intersection‑by‑intersection).
- Build the matrix pipeline. Convert counts to OD with PTV Visum ODME; one volume set = one demand mod.
- Agree on precedence & ownership. Log what each mod touches and set the rules before anyone stacks; seed controllers as needed.
PTV Vissim scenario manager: Conclusion
Scenario Manager in PTV Vissim kept our US‑51 corridor work fast, auditable, and comparable.
By stacking modular geometry, signal, and demand changes on a single calibrated base – and generating OD variants in PTV Visum – we tested more options with less rework while giving reviewers transparent traceability.
If you compare many alternatives quickly, PTV Vissim Scenario Manager should be your default workflow.

Make the most out of traffic simulation
Model before you implement: Real scenarios, “what‑ifs,”
and optimized multimodal systems
Make the most out of traffic simulation
Model before you implement: Real scenarios, “what‑ifs,” and optimized multimodal systems


